
Get OneCloud Connect on Mac: Full Installation & Setup Guide
In the modern world of remote work and global communication, having the right tools to stay connected is essential. Whether you're a business professional, a freelancer, or simply looking to improve your communication with friends and family, the OneCloud Connect app offers a powerful solution for HD video conferencing, messaging, and collaboration, all in one platform.
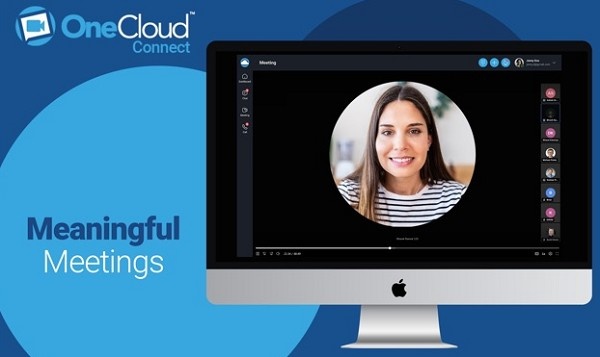
While OneCloud Connect is widely known for its mobile apps on Android and iOS, it also offers a robust desktop version that can be easily installed on MacOS devices. The Mac version of OneCloud Connect provides all the key features of the app, from video calls and screen sharing to team messaging and voicemail management.
In this guide, we’ll walk you through the complete process of installing, setting up, and using the OneCloud Connect app on your MacOS device. Whether you're a first-time user or someone looking to make the switch from mobile to desktop, this step-by-step guide will ensure you get the most out of this powerful communication tool.
What is OneCloud Connect?
Before we dive into the installation and usage process, it’s important to understand what OneCloud Connect is and why it’s a great choice for both individuals and businesses.
OneCloud Connect is a cloud-based communication platform that integrates several key features into a single application. With OneCloud Connect, users can host or join HD video conferences, make voice calls, send direct messages, and manage voicemail—all from one easy-to-use platform. The app is designed to make communication smoother, especially for remote teams, allowing them to collaborate in real time, no matter where they are.
Some of the core features of OneCloud Connect include:
HD video conferencing for seamless virtual meetings.
Instant messaging for quick communication.
Screen sharing and file sharing for better collaboration.
Voicemail management to keep track of important messages.
Softphone capabilities for making and receiving voice calls.
Secure, encrypted communications to ensure your conversations are protected.
Now that we understand the benefits of OneCloud Connect, let’s get into how to install and use it on your Mac device.
Steps to Download OneCloud Connect on Your Mac Devices
Installing OneCloud Connect on your MacOS is a straightforward process. Follow these simple steps to get started:
Step 1: Check System Requirements
Before downloading and installing OneCloud Connect, it’s essential to make sure that your Mac system meets the app’s minimum requirements:
Operating System: macOS 10.14 (Mojave) or higher
Processor: Intel Core i3 or better
RAM: 4 GB minimum (8 GB or more recommended for optimal performance)
Storage: 100 MB of free disk space
Internet Connection: Stable internet connection (Wi-Fi or wired)
If your system meets these requirements, you’re ready to proceed with the installation.
Step 2: Download OneCloud Connect for Mac
Go to the Official OneCloud Connect Website: Open your web browser and go to the official OneCloud Connect website. Look for the download section, which is typically under "Download" or "Get the App" in the main menu.
Select the Mac Version: Once you are on the download page, look for the Mac version of the app. You should see a clear option for downloading the MacOS version of OneCloud Connect.
Download the Installer: Click the download button to get the OneCloud Connect installer file for MacOS. The file should be named something like OneCloudConnect.dmg and will begin downloading to your Mac.
Step 3: Install OneCloud Connect on MacOS
Open the Downloaded File: Once the file is downloaded, locate the OneCloudConnect.dmg file in your Downloads folder (or wherever your browser saves downloaded files). Double-click on the file to open it.
Drag the App to Your Applications Folder: After the .dmg file opens, a window will appear with the OneCloud Connect application icon. Simply drag the OneCloud Connect icon to the Applications folder shortcut within the same window. This will install the app on your Mac.
Complete the Installation: After dragging the app to the Applications folder, the installation will be complete. You can now close the .dmg window and eject the disk image by dragging it to the trash or clicking the eject button in Finder.
Step 4: Launch OneCloud Connect
Open OneCloud Connect: Go to the Applications folder on your Mac and double-click on the OneCloud Connect app icon to open it.
Sign In or Create an Account: If you’re a first-time user, you will need to create a new account. Enter your email address and create a secure password. If you already have an account, simply sign in using your existing credentials.
Set Up Your Profile: After signing in, you may be prompted to complete your profile. Add your name, photo, and any other relevant information to personalize your account. This step is optional but recommended for a more customized experience.
How to Use OneCloud Connect on MacOS?
Once you’ve installed and set up OneCloud Connect on your Mac device, you can start using the app for all your communication needs. Here’s a detailed guide to help you navigate its key features:
1. Join or Host Video Meetings
OneCloud Connect makes it easy to join or host video conferences. Whether you're meeting with clients, collaborating with your team, or participating in a webinar, the app's video conferencing features are simple to use.
To Join a Meeting:
Click on the Meeting Link: If someone sends you a meeting link (via email or message), click on it. The link will automatically open the OneCloud Connect app on your Mac and take you directly to the meeting.
Enter the Meeting ID: If you don’t have a link but know the Meeting ID, open the app, click on the “Join Meeting” button, and enter the Meeting ID and any required passcode.
To Host a Meeting:
Click “Host a Meeting”: After logging in, you’ll see a “Host a Meeting” button on the app’s home screen. Click it to start a new meeting.
Select Meeting Options: You can choose whether to host a video-only meeting, a meeting with screen sharing, or a simple audio meeting.
Invite Participants: After the meeting is created, you’ll get a unique meeting link that you can send to participants through email, chat, or social media. You can also invite people via phone number if they have access to the app.
2. Make and Receive Voice Calls
In addition to video calls, OneCloud Connect allows you to make and receive voice calls directly from your Mac.
To Make a Call:
Click on the Phone Icon: On the app’s main screen, click the phone icon to open the dialer.
Enter the Number: Dial the phone number you want to call, or select a contact if they’re in your address book.
Start the Call: Press the call button to initiate the call.
To Receive a Call:
Incoming Call Notifications: When someone calls you, a pop-up will appear on your screen. You can click Accept to answer the call.
3. Messaging and File Sharing
OneCloud Connect offers a robust messaging system that lets you communicate with individuals or teams via direct messages or group channels.
Send a Message:
Click on the Messages Icon: In the app, navigate to the messaging section where you can start a new conversation.
Enter the Recipient: Select an individual or a group from your contact list and start typing your message.
Send Files: You can easily send files during a chat by clicking the file attachment icon and choosing the file you want to upload.
4. Screen Sharing and Collaboration
Screen sharing is a vital feature of OneCloud Connect, especially during meetings or team collaborations. You can share your entire screen, a specific application window, or a file.
To Share Your Screen:
Click on the Share Screen Button: During a video meeting, click the Share Screen button at the bottom of the meeting window.
Select What to Share: You can choose to share your entire screen or just a specific application window.
Stop Sharing: When you’re done, simply click the Stop Sharing button to end the screen share.
5. Voicemail Management
OneCloud Connect makes it easy to manage your voicemails directly from the app.
To Access Voicemail:
Navigate to the Voicemail Section: Click on the Voicemail tab in the app to see any missed messages.
Listen to Voicemails: You can play and listen to any voicemail directly in the app.
Manage Voicemails: Delete or save voicemails to your inbox as needed.
Troubleshooting Common Issues
If you encounter issues while using OneCloud Connect on MacOS, here are some common solutions:
App Not Opening:
Reinstall the App: If the app isn’t launching, try uninstalling it and then reinstalling it from the official website.
Poor Audio or Video Quality:
Check Your Internet Connection: Ensure you have a stable internet connection. A slow or unstable connection can affect call quality.
Update Your Camera and Microphone: Make sure your Mac’s camera and microphone are working properly. You can test them in the System Preferences under Sound and Camera.
Unable to Join Meetings:
Check Meeting ID: Make sure you’ve entered the correct Meeting ID and passcode if required.
Conclusion
Installing and using the OneCloud Connect app on your Mac device is an easy and effective way to stay connected with colleagues, clients, and teams. The app offers a range of features that make communication more efficient, including HD video conferencing, messaging, screen sharing, and voicemail management.
By following the step-by-step guide outlined above, you can easily download, install, and start using OneCloud Connect to enhance your communication experience. Whether you’re working from home or collaborating with a remote team, OneCloud Connect is a powerful tool that simplifies the way you communicate.
Updates