
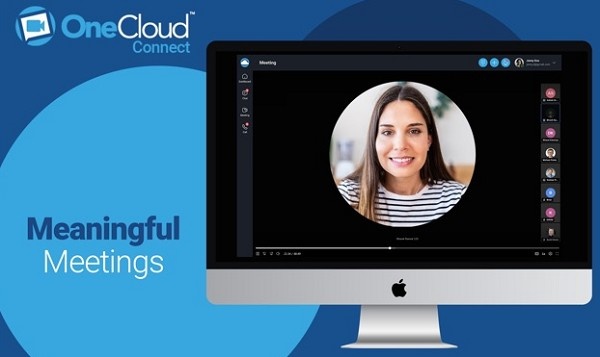
OneCloud Connect for PC - Download on Your Windows & Mac
OneCloud Connect is a versatile and user-friendly application designed to enhance communication and collaboration across various platforms. Whether you are using a Windows PC or a Mac, OneCloud Connect offers a seamless experience with features like video conferencing, secure messaging, and file sharing. In this guide, we’ll explore how to download, install, and effectively use OneCloud Connect on your computer.
Why Use OneCloud Connect on PC and Mac?
Using OneCloud Connect on a desktop or laptop brings several advantages:
Larger screen real estate: Ideal for video conferences, document reviews, and presentations.
Keyboard and mouse support: Easier typing and navigation compared to mobile devices.
Powerful hardware compatibility: Leverage the processing power of your PC or Mac for smooth multitasking.
Advanced features: Access additional functionalities like screen sharing and enhanced file management.
System Requirements for OneCloud Connect
Before downloading the app, ensure your device meets the minimum system requirements:
For Windows:
Operating System: Windows 10 or later
Processor: Intel Core i3 or equivalent
RAM: 4GB or more
Hard Drive: At least 500MB of free space
Internet Connection: Stable broadband connection
For Mac:
Operating System: macOS 10.13 (High Sierra) or later
Processor: Intel or Apple Silicon (M1/M2)
RAM: 4GB or more
Hard Drive: At least 500MB of free space
Internet Connection: Stable broadband connection
Download OneCloud Connect for PC Windows
Follow these steps to download and install OneCloud Connect on your Windows computer:
Step 1: Visit the Official Website
Open your preferred web browser and navigate to the official OneCloud Connect website.
Go to the Downloads section.
Step 2: Choose the Windows Version
Click on the Download for Windows button.
Save the installer file (usually a .exe file) to your computer.
Step 3: Install the Application
Locate the downloaded file in your Downloads folder.
Double-click the file to start the installation process.
Follow the on-screen instructions to complete the setup.
Once installed, launch the app from your desktop or Start Menu.
Download OneCloud Connect for Mac Devices
Follow these steps to download and install OneCloud Connect on your Mac:
Step 1: Visit the Official Website
Open Safari or any other web browser on your Mac.
Navigate to the official OneCloud Connect website.
Access the Downloads section.
Step 2: Choose the macOS Version
Click on the Download for Mac button.
Save the installer file (usually a .dmg file) to your computer.
Step 3: Install the Application
Locate the downloaded .dmg file in your Downloads folder.
Double-click the file to open the installer.
Drag the OneCloud Connect icon into the Applications folder.
Open the app from the Applications folder or the Launchpad.
Setting Up OneCloud Connect on PC and Mac
Once you’ve installed the app, follow these steps to set it up:
Step 1: Create an Account
Open OneCloud Connect.
Click on Sign Up and enter your email address and password.
Verify your email address to activate your account.
Step 2: Log In
Open the app and click on Log In.
Enter your email and password, then click Submit.
Step 3: Configure Your Settings
Navigate to the Settings menu.
Adjust preferences such as notification alerts, audio/video settings, and language options.
Key Features of OneCloud Connect for Desktop Users
1. HD Video Conferencing
Enjoy high-definition video calls with minimal latency.
Use the app’s grid view to see all participants simultaneously.
2. Screen Sharing
Share your desktop or specific application windows during meetings.
Annotate shared screens for better collaboration.
3. Secure Messaging
Send instant messages to individuals or groups.
Use emojis, reactions, and attachments for dynamic communication.
4. File Management
Upload, share, and organize documents directly within the app.
Access shared files from past meetings or chats.
5. Advanced Call Features
Make and receive calls using the integrated softphone.
Record calls, hold calls, and transfer calls effortlessly.
Steps to Use OneCloud Connect App on PC Windows & Mac
Hosting a Meeting:
Launch the app and click on Host a Meeting.
Customize the meeting settings, such as requiring a password or enabling a waiting room.
Share the meeting link with participants via email or messaging platforms.
Start the meeting and utilize tools like screen sharing and chat.
Joining a Meeting:
Open the app and click on Join a Meeting.
Enter the meeting ID and passcode (if required).
Adjust your audio and video settings before joining.
Managing Contacts:
Navigate to the Contacts tab.
Add colleagues or team members by email.
Organize contacts into groups for easier management.
Recording Meetings:
Start a meeting and click on the Record button.
Save the recording locally or to the cloud after the meeting ends.
Tips for Optimizing OneCloud Connect on Desktop
Use a Wired Internet Connection:
Ensure stable and high-speed connectivity for uninterrupted meetings.
Adjust Video Settings:
Lower the video resolution in case of slow internet to maintain call quality.
Regular Updates:
Keep the app updated to access the latest features and security enhancements.
Shortcut Keys:
Learn keyboard shortcuts for quick access to frequently used functions.
Pros and Cons of OneCloud Connect on PC and Mac
Pros:
Wide range of features tailored for professional and personal use.
Enhanced productivity with screen sharing and file management.
Secure and encrypted communication.
Cross-platform compatibility for seamless collaboration.
Cons:
May consume significant system resources during HD video calls.
Some advanced features require a premium subscription.
Troubleshooting Common Issues
Issue: Unable to Install the App
Solution: Ensure your device meets the system requirements and has sufficient storage space.
Issue: App Not Launching
Solution: Restart your computer and check for any pending system updates.
Issue: Poor Audio/Video Quality
Solution: Test your microphone and camera settings in the app. Switch to a wired connection if necessary.
Issue: Unable to Join a Meeting
Solution: Verify the meeting ID and password. Check your internet connection.
Frequently Asked Questions (FAQs)
Q1: Is OneCloud Connect free for PC and Mac?
Yes, the app is free to download. Some features may require a subscription.
Q2: Can I use OneCloud Connect on multiple devices?
Yes, you can log in to your account on multiple devices simultaneously.
Q3: Does OneCloud Connect support external webcams?
Yes, the app supports most external webcams and microphones.
Q4: Are my meetings and data secure?
Absolutely. OneCloud Connect uses end-to-end encryption to protect your data.
Q5: Can I join a meeting without downloading the app?
Yes, you can join meetings via a web browser using the meeting link.
Conclusion
OneCloud Connect is a powerful and intuitive application for Windows and Mac users. By following the steps outlined in this guide, you can easily download, install, and make the most of its advanced features. Whether you’re hosting a meeting, sharing files, or engaging in secure messaging, OneCloud Connect ensures a seamless and efficient experience. Start using OneCloud Connect on your PC and take your collaboration to the next level!
Updates